Session 6: Deploying your code
Learning outcomes
- Understand the purpose of platforms like Heroku
- Understand the importance of version control and testing
- Deploy your first app
Recap from last session
- What are APIs used for?
- What's an API key?
- What’s JSON, and why might we want to use it?
Let's get started!
What it means to deploy code
So far, you’ve been running your website “locally”, using your own computer as a server, so that your Python and HTML code, working together with Flask, can display your website in your browser. This means your website is only available on your own machine, and the rest of the world can’t see it.
In order to show off your fantastic work to the world, you’ll need to “deploy’ your code to a web server, so that when people type in your website’s URL, there’s a server somewhere that knows what to do with that request and how to run your code so that people can see your website.
You could use your own computer as a web server, but its processors can only handle so much. For example, if your website had 100,000 visitors a day, you’d need a computer that was powerful enough to handle all those requests coming in (directing people to the right pages, showing them the right images, crunching numbers, executing queries, etc.). You also wouldn’t want your website to go offline every time your laptop goes offline!
Fortunately, there are services we can use that take care of all these headaches for us. For this course, we’re using one called Heroku.
About Heroku
Heroku is a cloud-based Platform as a Service (or “PaaS”) that people can use to “deploy” their code online to get their web apps up and running. Unlike your laptop, cloud-based platforms are always on, and easily scalable - so if your web app becomes massively popular, you can upgrade your computing power to handle all that extra traffic without having to buy another actual computer.
Setting up Heroku so it works with the command line
Today we’ll be using the command line, Heroku, and some simple git to deploy some test code and get a simple web app “live” on the internet! Before doing this for your own project, we’ll work through Heroku’s demo together. We're not following the exact setup instructions Heroku gives, so please follow what your instructors say step by step. Don't get tempted to rush ahead!
- Log into your Heroku account.
- Click Python from the options that show, then you'll automatically be
taken to another page to get started
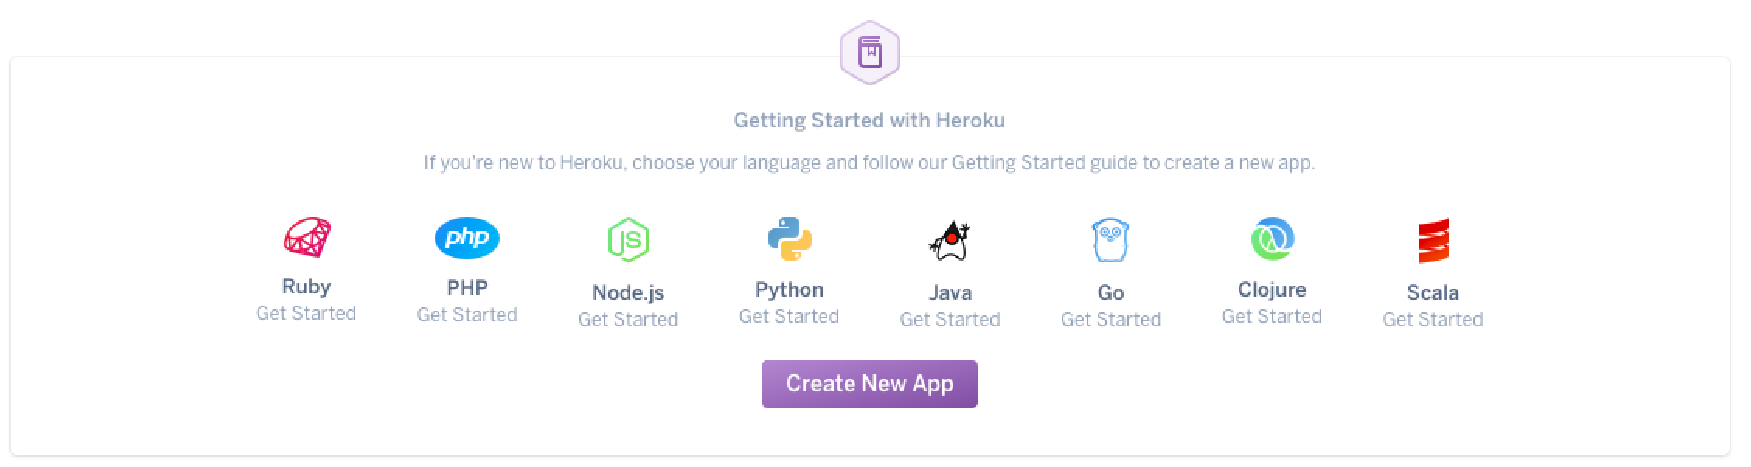
- You can ignore what the introduction says, because our setup is a little bit different. Simply click button that says “I’m ready to start” , and you’ll be taken to a new page.
- When you see the button below, click the arrow on the right side to
select your operating system, and download the “Heroku Command
Line Interface”.

Look for the installer in your Downloads folder, or wherever downloaded files usually end up on your computer, and then open the installer and follow the instructions. Installing this allows your command line to understand what you mean when you use the word heroku in your commands, and also makes it possible for you to push your code from your computer to Heroku’s servers (you’ll hear more about this later). If you have a Windows laptop, choose the "Recommended" installation. It might take a little time to install.
Once you’ve installed the Heroku CLI, open your command line and type heroku login. You’ll need to use your Heroku account details here.
When you’ve finished Step 6 above, go back to your web browser, scroll down a bit, and click the button saying you’ve installed the Heroku CLI.
Getting your Github code ready to work with Heroku
We’ll be using Heroku’s demo to see how to use git and Heroku to deploy a simple web app. For homework, you'll do the same thing for your competition project.
- We'll be “cloning” some files from a GitHub repository that already exists, so before we do that, we want to make sure we know where we're putting these files on our computer. Use the command line to navigate to wherever you’ve got your Code First Girls Python work. For example (yours will look different, depending on your file path) cd Documents/Code_First_Girls/Python_Stuff/Heroku_Demo
- Now that we know where we'll be putting the project files from GitHub, we'll use git clone to create a local copy on our computer. Type this into your command line: git clone https://github.com/heroku/python-getting-started.git
- Now we’ll make a folder to put these project files in (and navigate to that folder at the same time) by typing cd python-getting-started
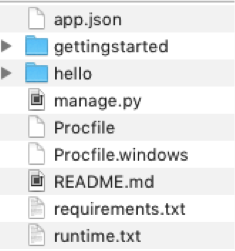
If you navigate in Explorer (Windows), Finder (Mac), or your command line to the python-getting-started folder you just created, you’ll see you’ve now got a copy of the files from GitHub, on your local machine:
You’ll need to create and deploy your simple app. You don’t have to write any code for this demo, because we’ve got all the files cloned from GitHub, and Heroku knows what to do with them. In your command line, type heroku create
Where’s my website and how do I update it?
When you create a web app, Heroku assigns you a random name/URL for it.
- Notice the light blue text below – copy the URL into your web browser....what do you see?
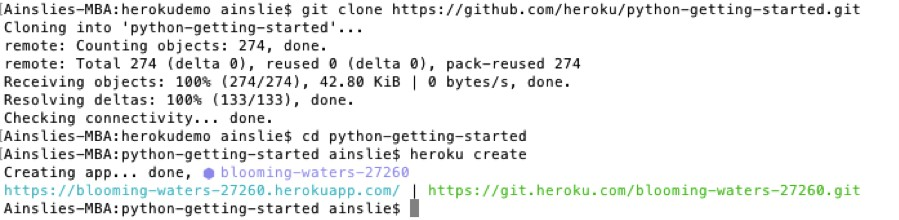
Notice the green text above – when you create an app with Heroku, Heroku makes an additional remote git repo, and associates it with your local git repository. It’s the repo in green that you push code to in order to make it live.
Remember, the only way to update your “live” website files is by pushing code from your local git repo to Heroku’s git repo (see the picture below). This means we’re not done yet, because we haven’t pushed any code to the Heroku Master.
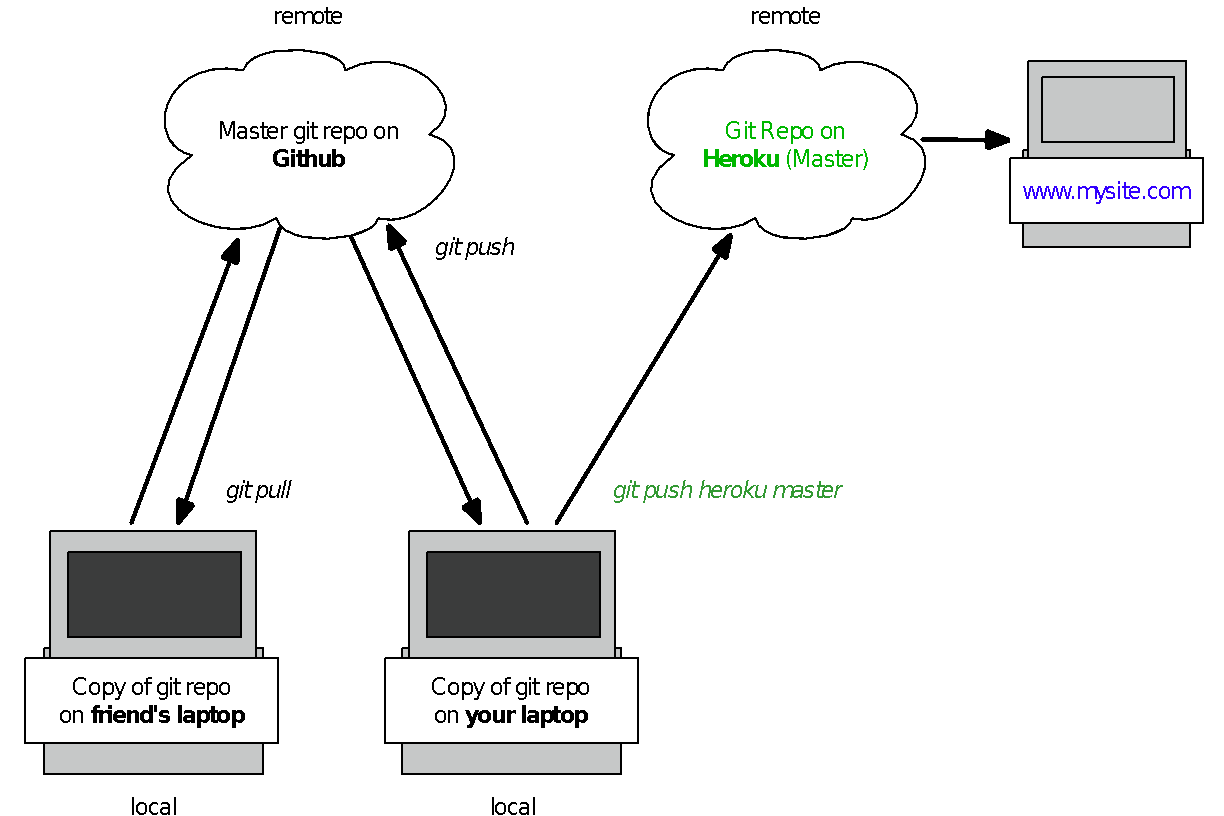
In your command line, type git push heroku master. What do you see now, when you navigate to your web app’s URL?
In preparation for setting up Heroku for your competition project, have a read through the text at that URL, and also here.
Getting your own project set up on Heroku
Be sure to have a look through the rest of the Getting Started documentation to get your project set up. If you see “Django” mentioned, don’t worry about that – we’re using Flask instead.
Since your website only has one URL, only one person on your team needs to do the create and deploy bits on Heroku for your competition project. However, if you want more than one team member to be able to push code to your live site (your Heroku remote repo), each person needs to be given access privileges for your app. You can set that up by clicking on the Heroku logo on the top left of the page, then clicking on your app, then the Access tab, and then Add collaborator.
Why it’s important to use git for version control
Whether you’re working on a project alone, or in a group, it’s really important to use git for version control. There are lots of benefits:
- If you’ve been committing code regularly, you won’t lose all your work if something happens to your computer (because you’ve got a copy of it in your git repository in the cloud)
- Having your work on Github helps you be a part of the coding community (and even get your first job as a developer!) because you can show off your code for others to see, and contribute to other people’s public projects
- It helps keep your team organised and working on the right bits, because every person in your team can see a master copy of code, any code branches you have, and commits and comments that might have important information (like, if a commit fixed a bug)
Remember, as shown in the picture earlier in these notes, anything you push to Heroku is “live” (available for the world to see), so it’s really, really important that you only push code to Heroku that comes from the Master branch of your project’s git repository.
If you’ve followed best practice and tested your code locally on your laptop before committing it to your team’s Master code branch, then your code should work as expected when it’s deployed on Heroku, because it’s just a copy of the code you’ve already tested.
Homework
- Deploy your competition site on Heroku. If you’re having trouble, please let an instructor know.
- Start using basic git commands to commit your code and push it to Heroku (check out the notes from Session 5).